Movavi Video Editor
Want to give your close friend or relative something special? Why not create a memorable photo slideshow for him or her? Select photos where you are both together, add some inspirational transitions, and complete your photo video with his or her favorite music. Et voila! Creating an unforgettable gift for a special person in your life is so easy!
Just download Movavi Video Editor and follow this step-by-step guide to learn how to make a video from photos.
Step 1: Download Movavi’s Clip-Making Software
Install Movavi Video Editor and start creating your movie with pictures, photos and music in no time.
Step 2: Add Your Photos to the Video Editor
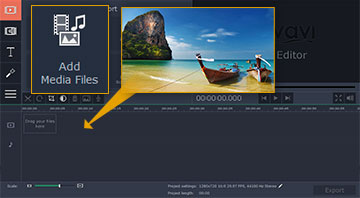
Launch the program and click the Add Media Filesbutton. Now select the files you want to include in your slideshow. The photos will appear on the Video Track. Alternatively, you can simply drag and drop the files you want to use to the working area right from the folder in which they’re stored. Once you’ve added your media files, place them in the order you want them to appear in the finished video.
Step 3: Add Animated Transitions
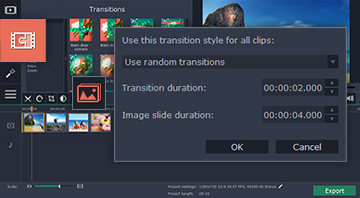
To add transitions between all your clips in one pass, just click the special button with a picture of mountains that’s above the timeline. In the dialogue box that appears, choose the transition style you want to use and set the duration. You can also select the slide duration in the same window.
If you want to review all the available transitions, open theTransitions tab and drag your selections to the appropriate positions on the timeline. For more information, read our guide on how to add transitions to your video.
Step 4: Jazz up Your Slideshow with Subtitles and Music
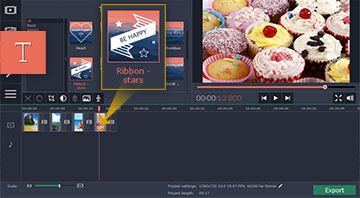
You can also add subtitles to your movie to give some context to the images and show why they’re special for you. Open the Titles tab, choose the title style you want to use, and drag it to the working area. Once you do so, a special Titles Track will appear automatically above the Video Track.
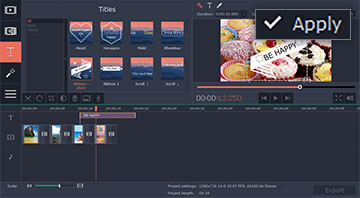
To add text and edit the title, double-click it; the selected caption will appear in the preview window, where you can enter your text, change the color and style, and more. To save the changes, click the Apply button in the upper right corner of the preview window. You can learn more about this aspect of Video Editor by reading the appropriate section in the user guide about adding subtitles to a video.

Once you’ve finished adding titles, return to the Importtab and click Add Media Files to select audio files for your slideshow, or drag them from the folder where they’re stored onto the Audio Track, marked with a musical note icon. For more information, check the user guide section about adding music to your video.
Step 5: Save Your Video

When everything is ready, save your file. Click Exportand choose the appropriate option for what you want to do with the video. Select the Save as Video tab if you’re planning to watch your video on a computer. If you want to transfer the file to a mobile device, open the appropriate tab to save for Apple, Android, or other device. You can also prepare your video for uploading to YouTube and other websites – to do this, click For Uploading Online. Now choose the required video preset and output format, and specify the filename and folder. Finally, click Start. That’s all there is to it – creating a video from pictures has never been easier!
See what else you can do with Movavi Video Editor:
Post a Comment
0 comments
Dear readers, after reading the Content please ask for advice and to provide constructive feedback Please Write Relevant Comment with Polite Language.Your comments inspired me to continue blogging. Your opinion much more valuable to me. Thank you.